Recreating the SSG from Scratch
2026-07-19
Motivation
First things first, we need to talk about why I am even doing this.
Before we jump into how I built Cangkang[1] Cangkang is the Indonesian word for "shell". Since I go by SiputBiru (Blue Snail), it felt fitting that the engine hosting my notes would be my shell, I originally planned to create this blog using something like Astro. But recently, I was watching a video by Gingerbill[2] Gingerbill "I Built My Own Static Site Generator With Odin in an Afternoon!", the creator of the Odin Programming Language[3] Odin Programming Language, where he created an SSG completely by himself. It made me stop and wonder: "Why don't I just do it myself?"
And actually cangkang was created around 4 months ago, i totally forgot to update this blog :)
Usually, when someone want to spin up a blog, we reach for the usual suspects React, Astro, or Vite SSG. But honestly, I think that is just too boring. I wanted to build this from the ground up.
How
With the motivation out of the way, let's jump right into how I actually built this thing.
Project Plan
Everything starts with a plan. I wanted to build this SSG engine entirely from scratch with zero external dependencies, written purely in Rust. Why Rust? I had heard that Rust has some really powerful string manipulation capabilities(compared to C ofc), so I just wanted to put it to the test.
Project Structure
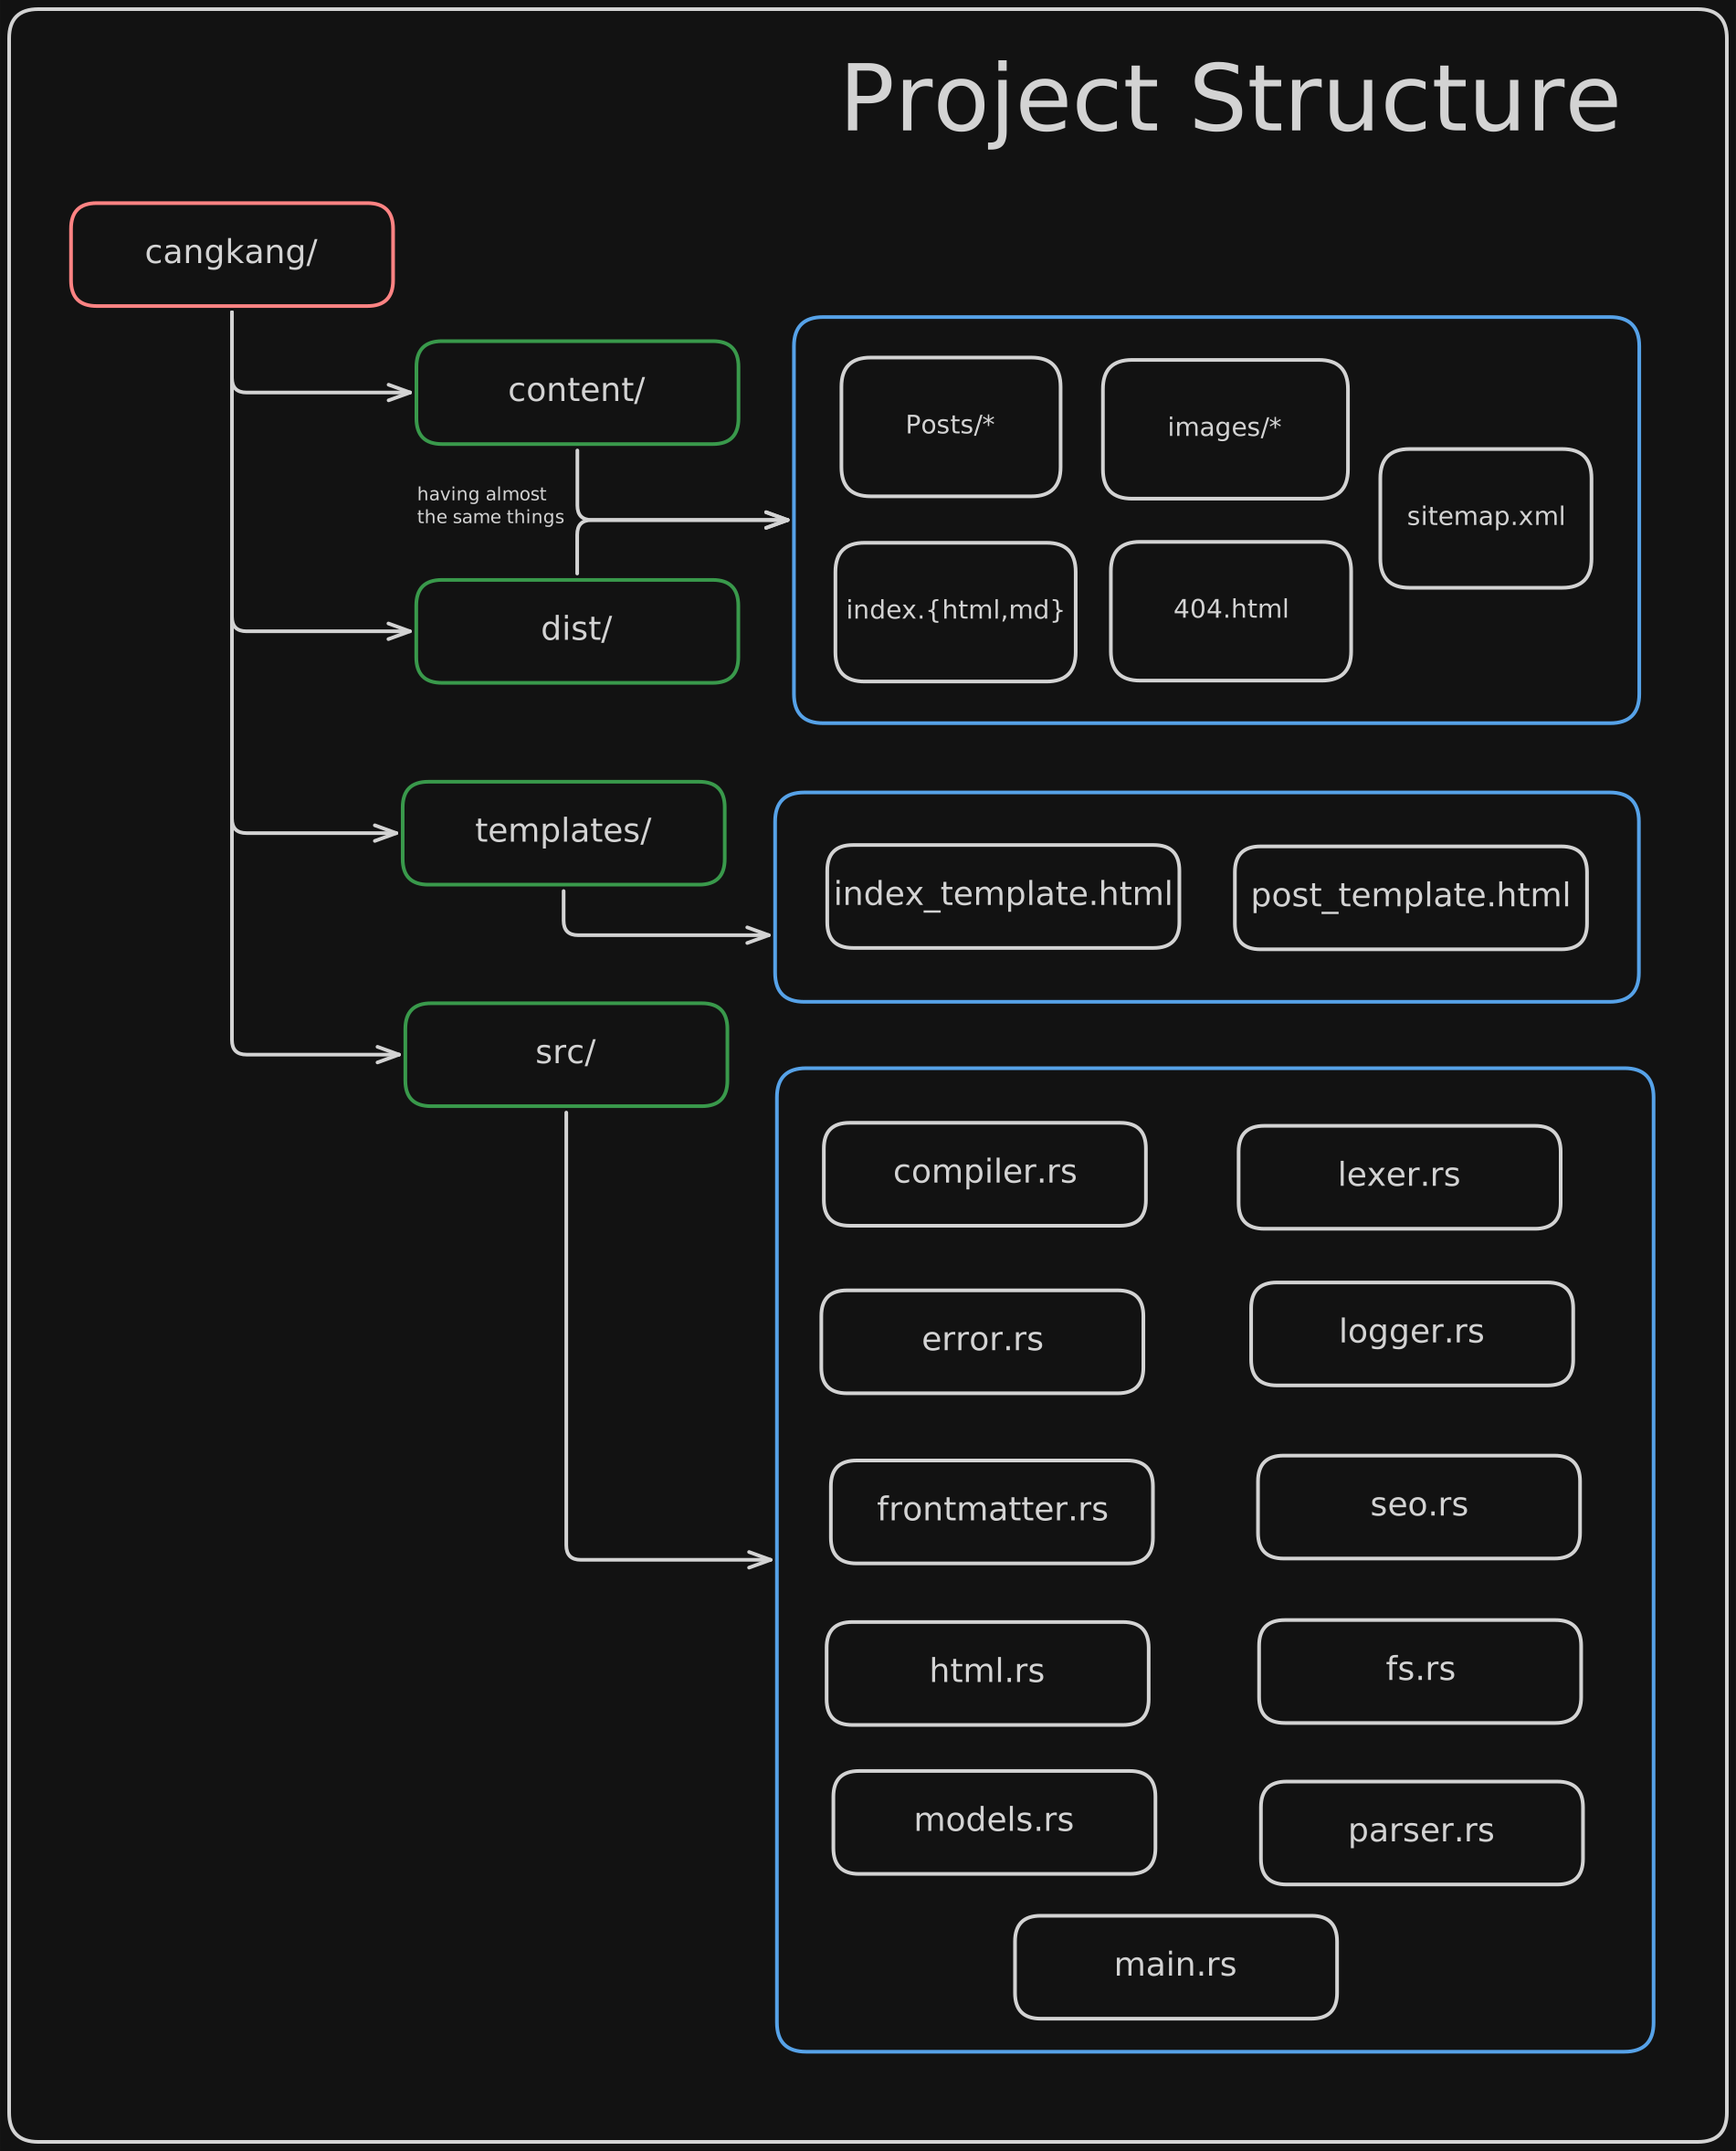
i created it with this structure is to make it as simple as possible, but still having proper (but not production ready) SSG that i can use easily and fix it easily.
the content and public is just the "asset" that the engine will read, the output will be placed inside dist directory then the web server will serve it as is without any other JS or SSR stuff. This makes the engine really just about reading the markdown -> lexer does tokenization -> parser -> html.
Technical Flow
The technical flow is orchestrated by the compiler[4] not really compiler we know like gcc or javac but we can still called it compiler right?, which acts as the central logic engine. The sequence for each file and the site as a whole is:
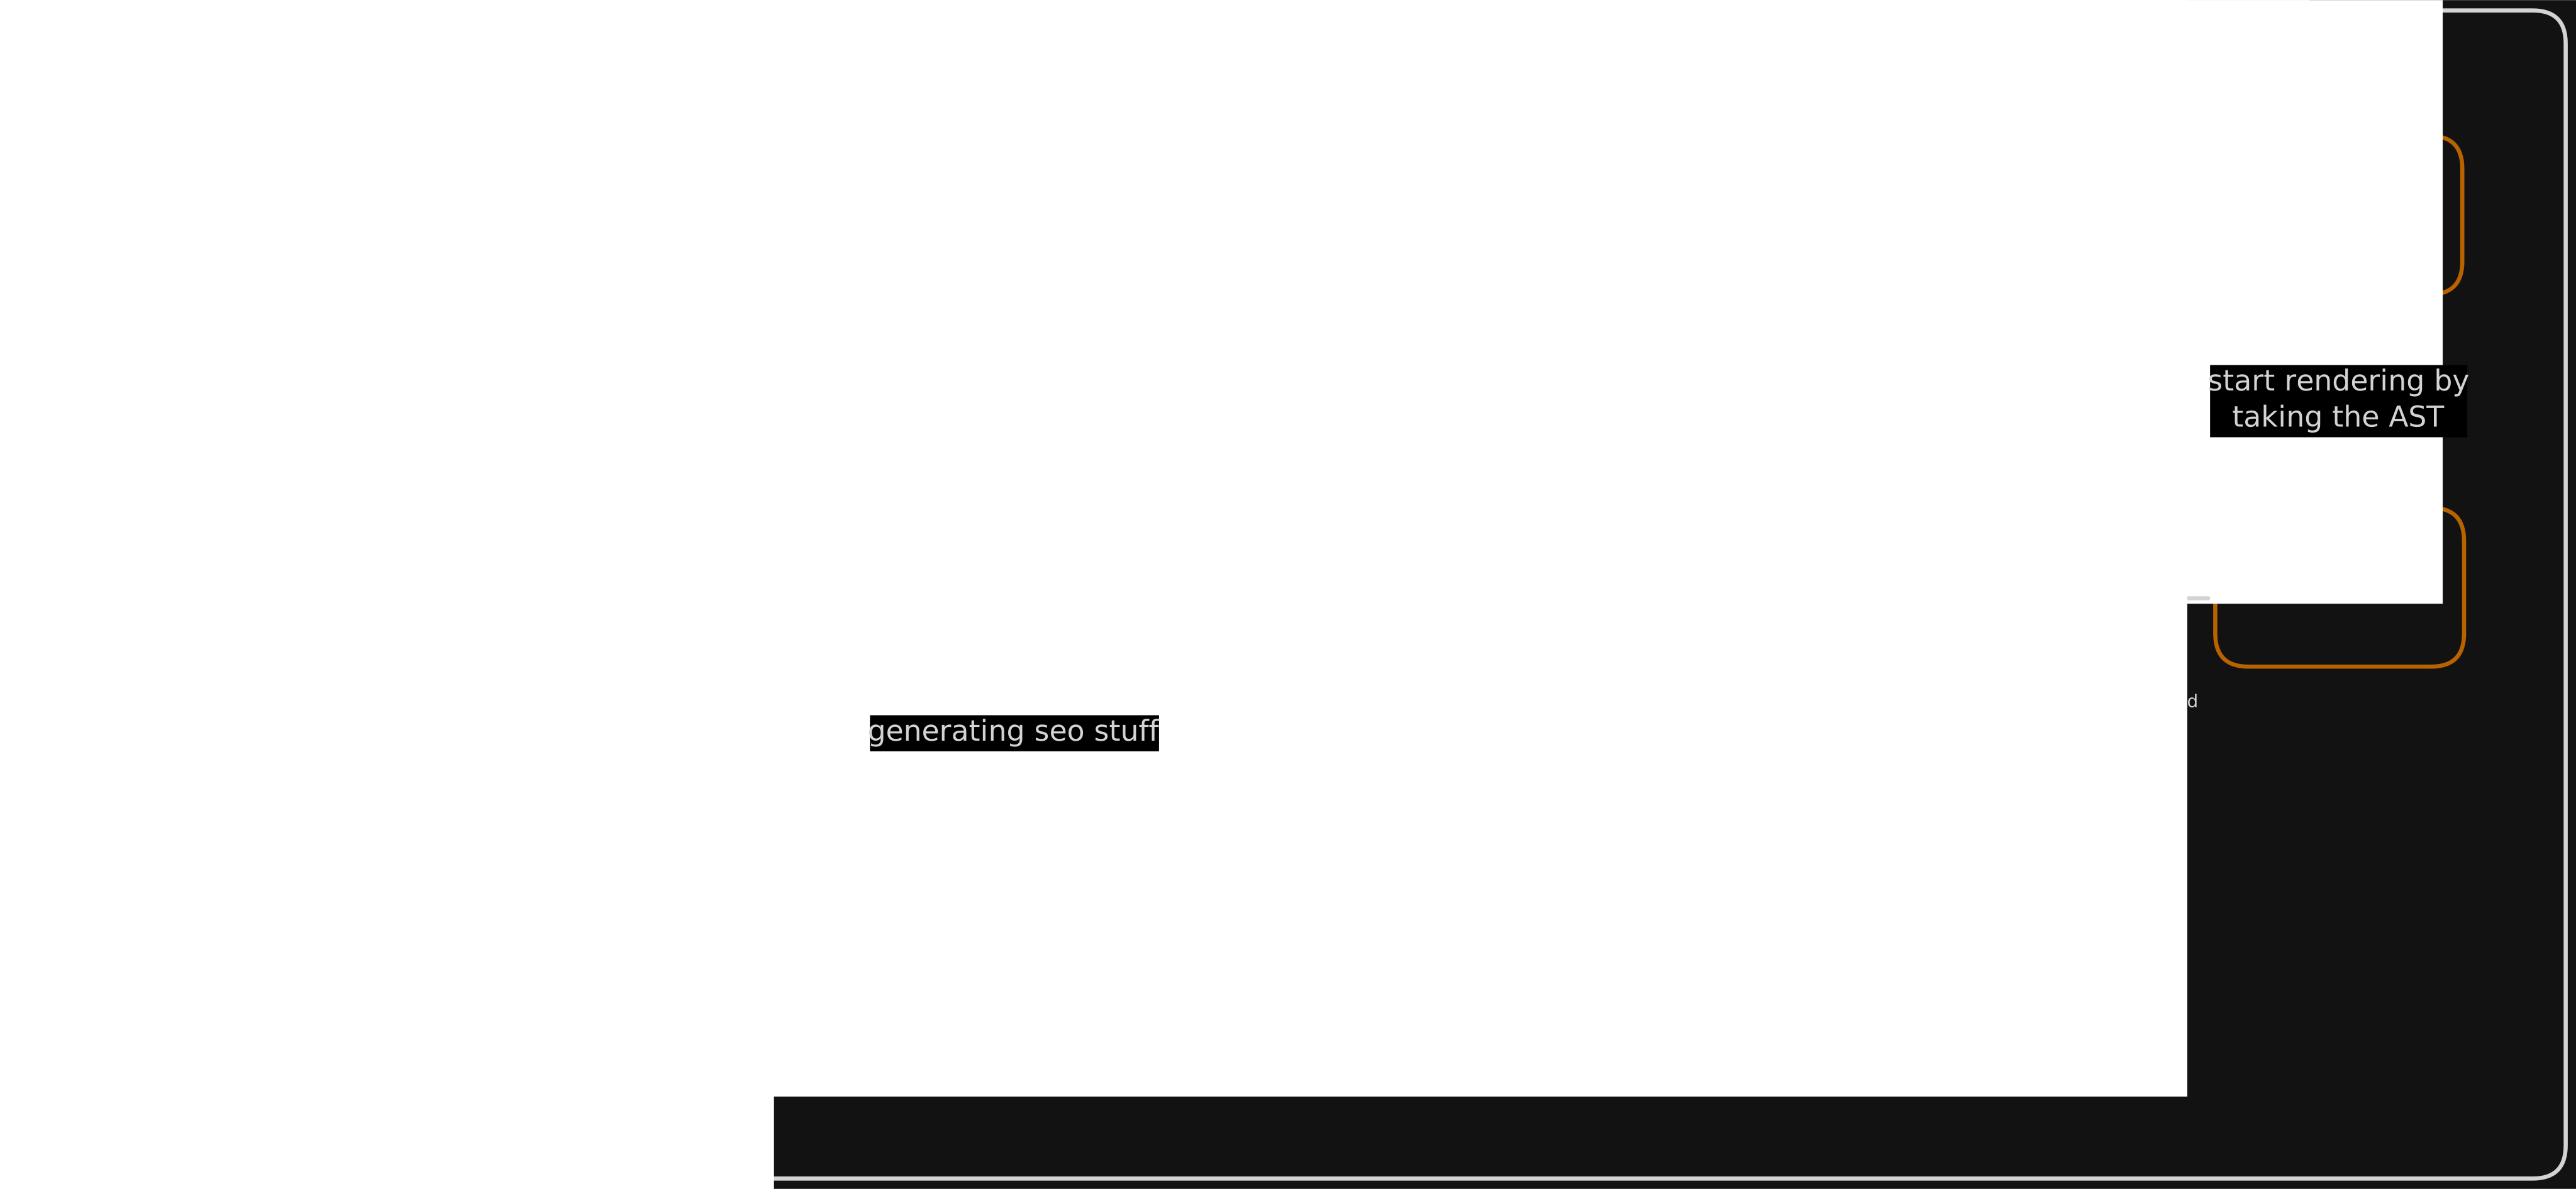
- FS Input: The compiler uses fs to read raw Markdown files and copy the public/ assets to dist/.
- Frontmatter: The compiler extracts JSON-like metadata (title, date, etc.) from the top of the Markdown file.
- Lexer: The raw Markdown text is passed to the lexer to be converted into a stream of tokens.
- Parser: The parser consumes those tokens and constructs an Abstract Syntax Tree (AST) representing the document structure.
- HTML: The renderer takes the AST and converts it into a rendered HTML string (the page body).
- Compiler Template Injection: The compiler takes that rendered HTML and performs string substitution on the HTML templates ({{ content }}, Recreating the SSG from Scratch, etc.).
- SEO: After all pages are processed, the compiler passes the collected metadata to the seo module to generate site-wide assets like the sitemap.
- FS Output: The final, fully-formed HTML files are written to the dist/ directory
Main Setup
the way i will use it much more like this: run the program, the program will read the dir i want to read then convert it to html with template.
the main.rs will just looks like this:
fn main() {
  if let Err(e) = compiler::build_site() {
    log_error;
    eprintln;
    std::process::exit(1);
  }
}
really simple right?
Handling Error with style
To keep our code clean, we define a CangkangError enum. it will handle almost error that can be happen in cangkang.
the CangkangError enum will just like this:
#[derive(Debug)]
pub enum CangkangError {
    // IO Error with option context
    Io(String, io::Error),

    // Markdown parsing errors
    Parse { message: String, line: usize },

    // Frontmatter syntax errors
    Frontmatter(String),

    // HTML Template errors
    Template(String),
}
To make these errors helpful for users, we can implement fmt::Display. This allows us to customize the output, adding specific context (like a file path or a line number) only when it's available.
impl fmt::Display for CangkangError {
    fn fmt(&self, f: &mut fmt::Formatter<'_>) -> fmt::Result {
        match self {
            // Compressed IO logic using a simple prefix
            Self::Io(ctx, err) if ctx.is_empty() => write!(f, "IO Error: {err}"),
            Self::Io(ctx, err) => write!(f, "IO Error at '{ctx}': {err}"),

            // Inline the rest for brevity
            Self::Parse { message, line } => write!(f, "Parse Error (line {line}): {message}"),
            Self::Frontmatter(msg) => write!(f, "Frontmatter Error: {msg}"),
            Self::Template(msg) => write!(f, "Template Error: {msg}"),
        }
    }
}
Finally, we use an Extension Trait called IoContext. This is a bit of Rust "magic" that lets us add the .with_ctx() method directly onto Rust's standard Result.
pub trait IoContext<T> {
    fn with_ctx<S: Into<String>>(self, ctx: S) -> Result<T, CangkangError>;
}

impl<T> IoContext<T> for Result<T, io::Error> {
    fn with_ctx<S: Into<String>>(self, ctx: S) -> Result<T, CangkangError> {
        self.map_err(|e| CangkangError::Io(ctx.into(), e))
    }
}
The result? Instead of writing complex match statements every time we open a file, we can simply chain our error handling:
before:
let data = fs::read_to_string("config.toml")
    .map_err(|e| CangkangError::Io("config.toml".to_string(), e))?;
after:
// example with read_to_string
let content = fs::read_to_string(path).with_ctx(path)?;
FileSystem
Then we will start with the FileSystem. whats actually filesystem? this is just more like library that will be used as a file & folder maker.
There are several ways to read a file in Rust: loading the entire thing at once, processing it line-by-line (buffered), reading raw bytes, or even using memory mapping with crates like mmap[5] i never actually use it but it looks cool tho. mmap for massive datasets.
Since Markdown files are typically small, we’ll stick to the most straightforward method: fs::read_to_string.
pub fn read_markdown_file<P: AsRef<Path>>(file_path: P) -> Result<String, CangkangError> {
    let path = file_path.as_ref();
    fs::read_to_string(path).with_ctx(path.to_string_lossy())
}
I used path.to_string_lossy() here for our error context. This is a safe choice because it gracefully handles non-UTF-8 characters by replacing them with the Unicode Replacement Character (U+FFFD)[6] Special Unicode Code), this ensures our program never crashes just because of a weird filename.
Writing the processed HTML is just as simple. However, there is one extra step: we need to ensure the destination directory actually exists before we try to save the file.
pub fn write_html_file<P: AsRef<Path>>(file_path: P, content: &str) -> Result<(), CangkangError> {
    let path = file_path.as_ref();

    if let Some(parent) = path.parent() {
        fs::create_dir_all(parent).with_ctx(parent.to_string_lossy())?;
    }

    fs::write(path, content).with_ctx(path.to_string_lossy())
}
Finally, we need a way to copy assets (like CSS or images) from our source to our output folder. Since std::fs doesn't provide a recursive copy function out of the box, we’ll implement a simple one ourselves.
pub fn copy_dir_all(src: impl AsRef<Path>, dst: impl AsRef<Path>) -> Result<(), CangkangError> {
    let src = src.as_ref();
    let dst = dst.as_ref();

    if !src.exists() {
        return Ok(());
    }

    fs::create_dir_all(dst).with_ctx(dst.to_string_lossy())?;

    for entry in fs::read_dir(src).with_ctx(src.to_string_lossy())? {
        let entry = entry.with_ctx("directory entry")?;
        let file_type = entry.file_type().with_ctx("file type")?;
        let dst_path = dst.join(entry.file_name());

        if file_type.is_dir() {
            copy_dir_all(entry.path(), dst_path)?;
        } else {
            fs::copy(entry.path(), &dst_path).with_ctx(format!(
                "{} to {}",
                entry.path().display(),
                dst_path.display()
            ))?;
        }
    }

    Ok(())
}
This function scans a directory and, if it finds another folder inside, calls itself again. This "recursion" allows us to mirror even the most complex folder structures perfectly.
Lexer (Lexical analysis)
If you ever wondered what a lexer actually is, it's much more like someone that will break down our markdown into chunks named Tokens.
we can define our tokens with an enum much more like this:
#[derive(Debug, PartialEq)]
pub enum Token {
    HeadingMarker(u8),  // ######— carries
the level count
    Text(String),       // plain text
    Newline,            // \n
    Asterisk,           // *
    BracketLeft,        // [
In my implementation the lexer also has a little bit of functionality to read each char. the code is much more like this:
pub fn read_char(&mut self) {
    if self.read_position >= self.input.len() {
        self.ch = '\0';
    } else {
        self.ch = self.input[self.read_position];
    }
    self.position = self.read_position;
    self.read_position = 1;
}
and also there is next_token function that will actually use the read_char to check each char
pub fn next_token(&mut self) -> Token {
    match self.ch {
        '\n' => {
            self.read_char(); // Advance past the matched character for single-char tokens
            Token::Newline
        }
        '*' => {
            self.read_char();
            Token::Asterisk
        }
        '\0' => Token::Eof,
        '#' => {
            let mut level = 0;
            // Count how many '#' we have
            while self.ch == '#' {
                level = 1;
                self.read_char();
            }
            // Skip the trailing space if there is one
            if self.ch == ' ' {
                self.read_char();
            }
            Token::HeadingMarker(level) // Early return because we already advanced
        }
        '[' => {
            self.read_char();
            Token::BracketLeft
// etc
The next_token will also skip whitespace. Then the lexer returns the respective token that is associated with the current character. it can be explained much more like this:
The lexer reads one character at a time. For each character, it asks a question:
- Is it #? → Count how many → emit HeadingMarker(n)
- Is it *? → emit Asterisk
- Is it [ or ] or ( or )? → emit the matching bracket token
- Is it \n? → emit Newline
- Is it anything else? → keep reading until we hit a special character → emit the whole chunk as Text
Parser
After the Lexer breaks down the markdown file into tokens, the parser will just interpret what each token means. The parser will create AST[7] Abstract Syntax Tree. later the compiler and the html.rs will handle the conversion.
Before I explain the parser code, let's trace a simple example.
Take a simple Heading 1 stuff:
#This is Heading 1
The lexer will turn this into four tokens:
HeadingMarker(1) -> Text("This is Heading 1") -> Newline -> Eof
Now the parser takes those tokens. It looks at the first token:
First token is HeadingMarker(1) then call parse_heading().
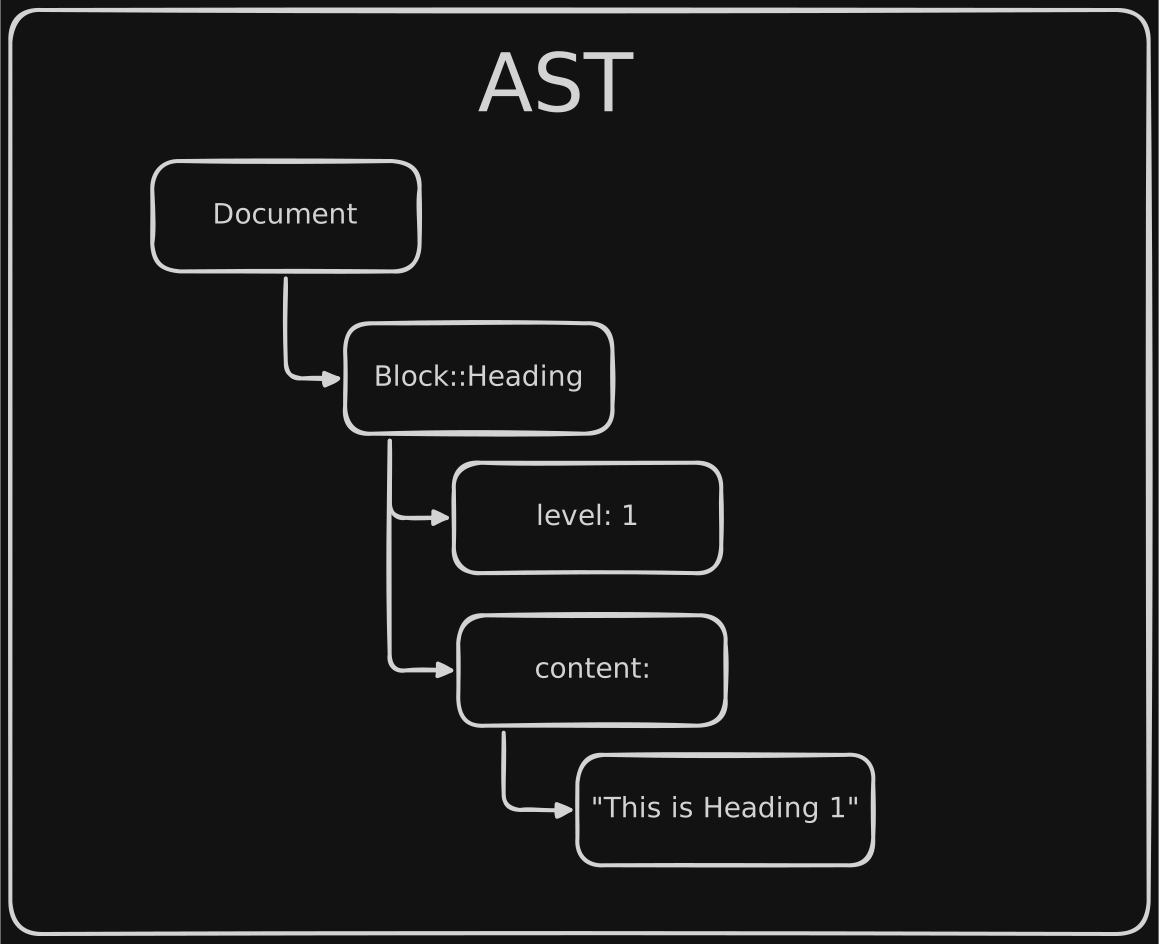
parse_heading() extracts the level (1), advances past the marker, then calls parse_inline() to read "This is Heading 1" as a Vec<Inline>. The result:
Block::Heading {
        level: 1,
        content: Inline::Text("This is Heading 1")
    }
That's it, later the HTML renderer sees this block and emits:
<h1>This is Heading 1</h1>
Here's the actual implementation:
    pub fn parse_document(&mut self) -> Result<Document, CangkangError> {
        let mut document = Document { blocks: Vec::new() };

        while self.current_token != Token::Eof {
            if self.current_token == Token::Newline {
                self.new_token();
                continue;
            }

            let block = match self.current_token {
                Token::HeadingMarker(_) => self.parse_heading()?,
                // ... other block types
for parse_heading stuff
    fn parse_heading(&mut self) -> Result<Block, CangkangError> {
        let level = match self.current_token {
            Token::HeadingMarker(l) => l,
            _ => {
                return Err(CangkangError::Parse {
                    message: "Expected HeadingMarker".to_string(),
                    line: 0,
                });
            }
        };

        self.new_token();

        let content = self.parse_inline()?;

        if self.current_token == Token::Newline {
            self.new_token();
        }

        Ok(Block::Heading { level, content })
    }
The AST looks like this:
If this pattern looks familiar, it should. I basically stole the design from Thorsten Ball's Writing an Interpreter in Go[8] You can read his book in here, one of the best books on building your own language. The two-token lookahead (current_token / peek_token) is lifted straight from his Monkey interpreter, just translated from Go to Rust.
HTML Renderer
OK, the parser is done. I want to talk about the HTML Renderer first because it's the fun one.
The core idea is dead simple: match on each AST node and emit the corresponding HTML tag.
maybe like this:
fn render_block(block: &Block) -> String {
    match block {
        Block::Heading { level, content } =>
            format!("<h{level}>{content}</h{level}>"),
        Block::Paragraph(content) =>
            format!("<p>{content}</p>"),
        Block::Code { language, code } =>
            format!("<pre><code class=\"language-{language}\">{code}</code></pre>"),
        // ... etc
    }
}
Lists are tricky. In Markdown, nesting is expressed by spaces at the start of the line, not by actual nested syntax. So the renderer tracks an indent_stack, every time indentation increases, we push a new <ul> (or <ol>). When it decreases, we pop and close them.
Take this markdown as another example:
* Main item
  * Nested item
  * Another nested
* Back to root
The AST is a single List block where each item carries an indent count:
Block::List([
    (0, [Text("Main item")]),
    (3, [Text("Nested item")]),
    (3, [Text("Another nested")]),
    (0, [Text("Back to root")]),
])
The renderer uses an indent_stack to track depth. When it sees indent increase → push <ul> and open a new <li>. When indent decreases → pop and close tags. The code looks like this:
fn render_nested_list(items, tag) {
    let mut indent_stack = vec![];
    for (indent, content) in items {
        while indent < indent_stack.last() {
            indent_stack.pop();
            // close </ul> and </li>
        }
        if indent > indent_stack.last() {
            indent_stack.push(indent);
            // open <ul>
        }
        // render <li>content</li>
    }
}
For alternating types like 1. Main\n * Nested, the render_list_chain() function detects consecutive list blocks of different types and nests them together instead of rendering them as siblings.
Compiler
After all of that we just need to do the compiler stuff. its just stitch all of our lexer, parser and the html rendering stuff to single function. much more like this:
fn compile_file(input_path, template) -> Result<PageInfo> {
    let raw = fs::read_markdown_file(input_path)?;

    //  Lex → Parse → HTML
    let lexer = Lexer::new(md_body);
    let mut parser = Parser::new(lexer);
    let document = parser.parse_document()?;
    let html_body = html::generate_html(&document);

    // Template substitution
    let final_html = template
        .replace("{{ content }}", &html_body)
        .replace("Recreating the SSG from Scratch", &title)
        .replace("2026-07-19", &metadata.date);

    // Write to dist/
    fs::write_html_file(output_path, &final_html)?;

    Ok(PageInfo { title, url, date, ... })
}
And that's it. The compiler walks the content directory, runs the pipeline for each file, then generates the html file. The whole SSG fits in under a thousand lines of Rust with zero dependencies.
Conclusion
And that's the whole thing. What started as a whim after watching Gingerbill's video turned into a functional SSG, written in Rust. And i think this is actually one of the most fun project i have ever write, without this project i dont really know how astro and other stuff actually works, and little bit learn about how the compiler/interpreter works also really fun!
I think in this era where so much AI product stuff. Recreational Programming is one of the things that can give the most motivation to keep going and give us "Fun".
The actual project is open source on Github.